 "UserNotFound" (jalopnik2)
03/17/2014 at 11:21 • Filed to: guitarlopnik
 4
4
 3
3|
"UserNotFound" (jalopnik2)
03/17/2014 at 11:21 • Filed to: guitarlopnik | 4
| 3 |
If you didn't see the first part of my project, !!!error: Indecipherable SUB-paragraph formatting!!! .
!!! UNKNOWN CONTENT TYPE !!!
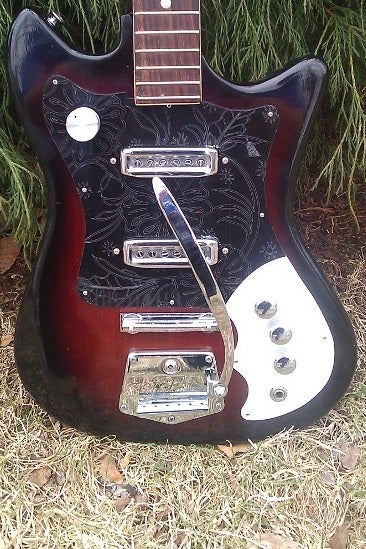
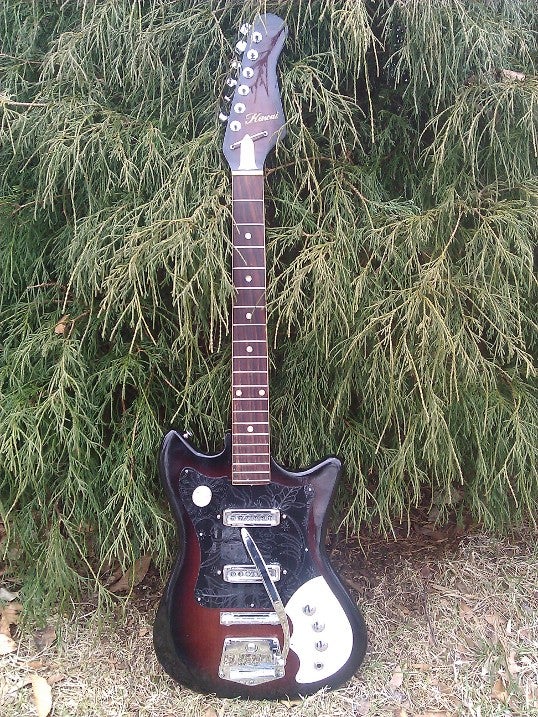
I've done some more work on the Kawai recently. The first thing I did since my last post was to work with my buddy to fix the electronics and string it up to see how it sounds. My reasoning was that everything was free to this point, so I should make sure it sounds nice before spending money on it. I used the stock bridge for now.
He is infinitely more patient with electronics and soldering than I am and he did a great job of cleaning up the wiring. All of the original wiring and components were in great condition so we just cleaned things up and reattached some broken pickup wires (which explains the not working part when I first got it).

I also found four bags of random guitar parts in my garage and in there were three chrome knurled knobs and a pair of chrome strap buttons in perfect condition so add that to the list of things I don't have to spend money on. The selector knob was found somewhere in my friend's basement guitar room. Yes 95% of this guitar basically belongs to him.
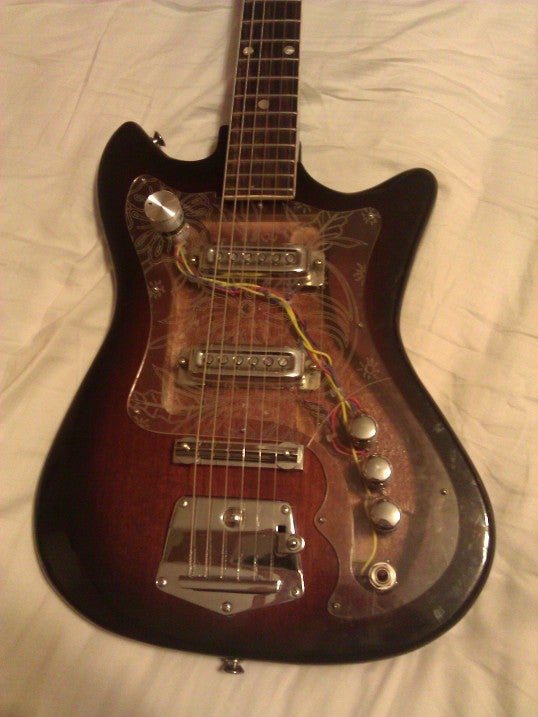
As for the sound, I don't have any recordings yet but believe me when I tell you this baby is a tone machine all the way. Those fat pickups hide fat magnets so there is a great warmth and bottom end to the tone with a strat-like brightness on top. It's totally worth the time spent on it. The short scale isn't a problem for me because I hardly play on the higher frets anyway. I use Rotosound strings because they are God's gift to music.
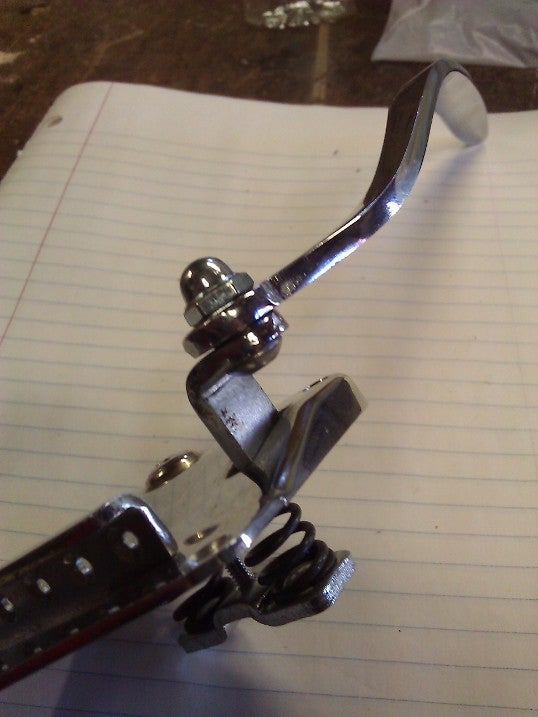
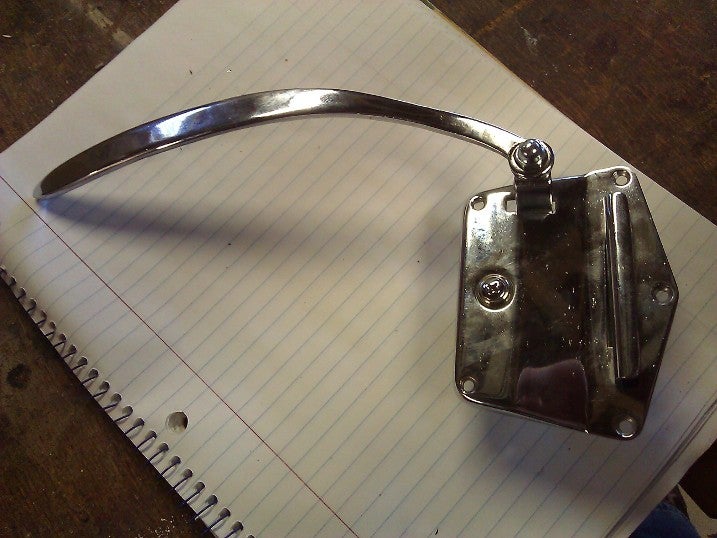
The next step, more on the restoration side than the upgrade side, was to get the tremolo working. This Kawai uses what, as far as I can determine, is a Fender Jaguar style tremolo, which apparently isn't a terrible design. In the interest of making everything look like it could have been original, I wanted to get the trem fixed.

The problem was that there was no retaining nut and the threads were stripped so I wouldn't be able to just throw something on there. Plus I'm a Baja SAE guy so I need to over-engineer at least one thing on all projects. As luck would have it, the Japanese used #10-24 threads in the 60's so it was as simple matter of getting a low profile stainless screw and machining a little threaded brass insert for the trem bar to ride on.
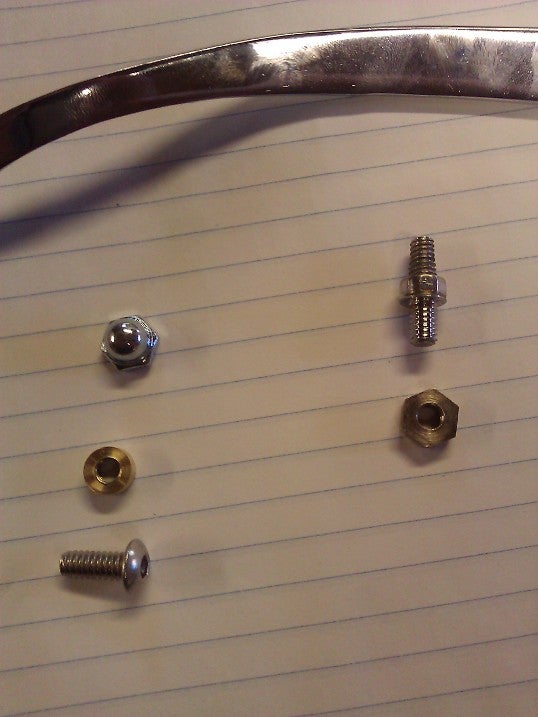
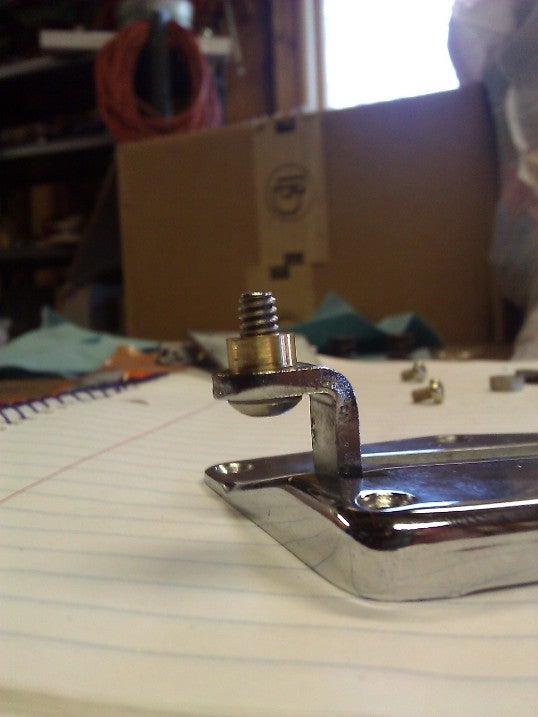
Some locktite and a chrome cap nut later and we're fixed.
The next step was to address thermal management. I don't want my screaming blues licks getting too hot and melting my pickups.
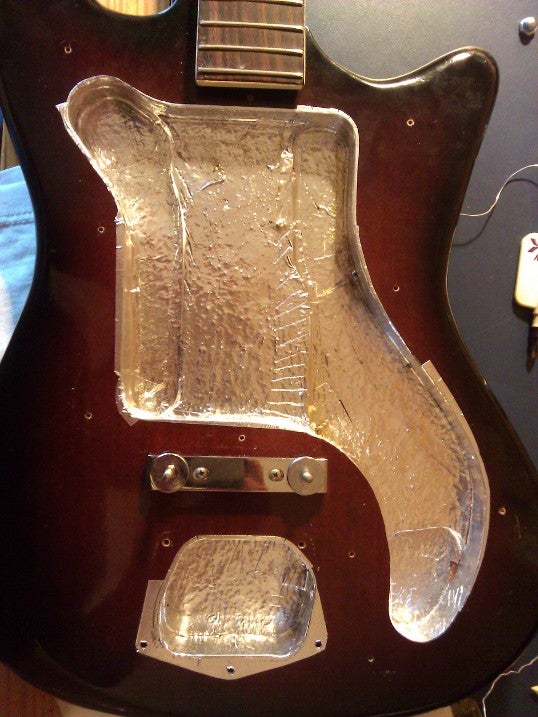
Just kidding this is electric shielding to cut down on radio interference. Fun fact: you can buy 2" wide copper tape for $20 on some guitar part websites, or you can buy 2" aluminum tape for $6 from Home Depot. The copper tape usually needs to be soldered from seam to seam to get it all electrically connected. With the aluminum tape, you can run a hot soldering iron along overlapping seams and it will melt the glue away in those places and then everything will be conductive. All of this is connected to the guitar ground.
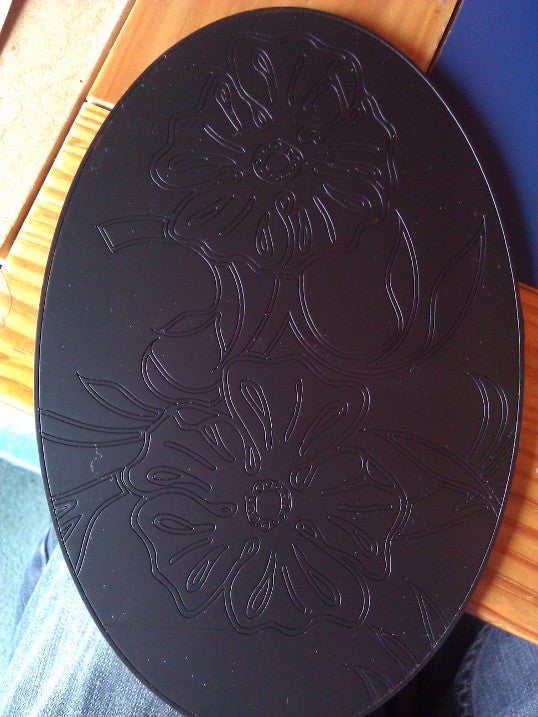
Lastly, I painted the back of each pickguard with Plastidip to see how I liked my color choice of black and white, and also to see how clear lexan with Plastidip on the back looks. I am pretty happy with the result.
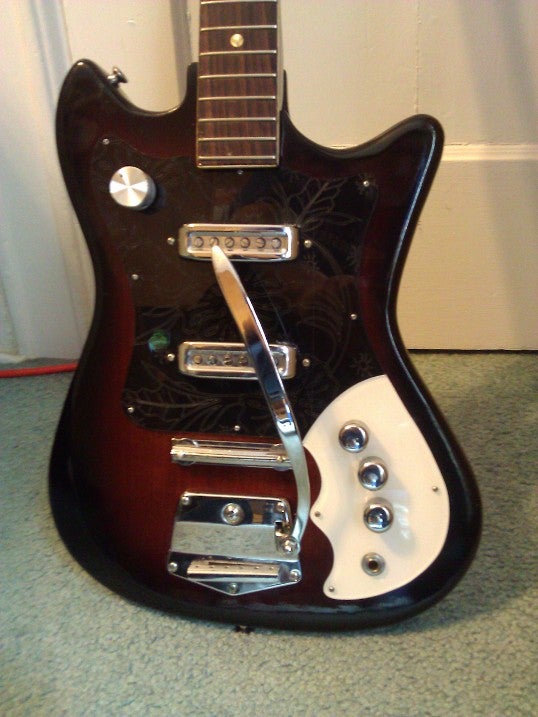
My final decision is whether to go with black on white or black on gold for the main pickguard. That means the engraving and edges will be either black or gold. I'm leaning towards black on white for the main guard and white on black for the controls guard. I am probably also going to stick with chrome screws everywhere.
As a bonus, here is what happens when you spray Plastidip on the engraved side of laser engraved lexan. Very neat effect which I can probably take advantage of in future projects.
 Sn210
> UserNotFound
Sn210
> UserNotFound
03/16/2014 at 22:26 |
|
This looks amazing! I want to try throwing some aluminum tape in my bass, that's a good idea
 bhardoin
> UserNotFound
bhardoin
> UserNotFound
03/16/2014 at 23:25 |
|
Turning out awesome!
 NaturallyAspirated
> Sn210
NaturallyAspirated
> Sn210
03/17/2014 at 14:06 |
|
Yeah, me too. That J pickup loves fluorescent lights.